All blogs you see on PreMadeNiches are ready-made WordPress sites. That means every site comes with pre-installed WordPress, theme, plugins, images, and articles. So what you are going to be downloading just after purchase is the whole content of a premade website including the database.
This also means that you must install it on a domain (you can also use subdomains or subdirectories) with a reliable web host that allows you to create a database. More about this here.
However, you have seen the beautiful themes on the product demos and you only want to use that theme/template on your existing blog or WordPress site. How will you do that?
For experienced WordPress users, it should be easy for you to figure that out.
But for new users, here’s a step-by-step, newbie hand-holding guide, on how to do that:
1 Buy the readymade blog where the theme/template you want is being used. You will be receiving a download link just after purchase.
2 Now, extract the downloaded file on your hard drive. Please DO NOT upload the whole shebang. You’ll be scratching your head later. Funny, but many have been doing that.
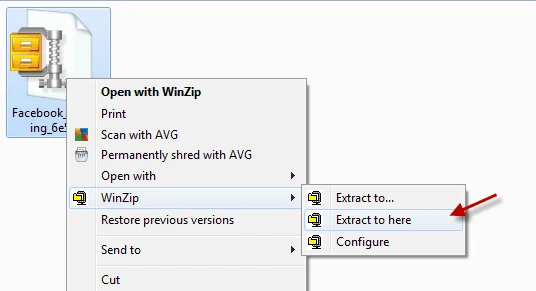
3 After extraction, open the extracted file.
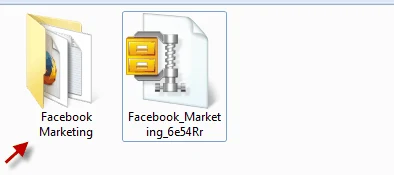
4 Open the “Files to Upload” folder.
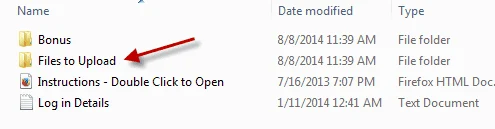
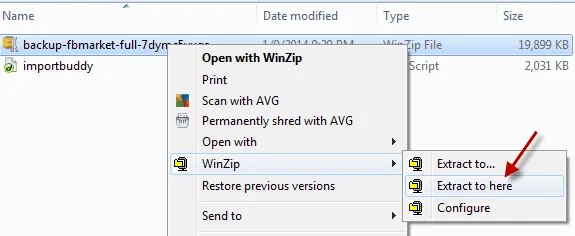
5 Take note of the backup file. In this example, the backup file is called “backup-fbmarket-full-7dymc5vuga” (every blog package has its own different backup file name).
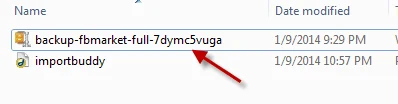
6 Extract the backup file.
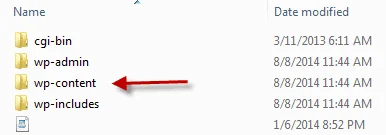
7 After extracting, open the “wp-content” folder.
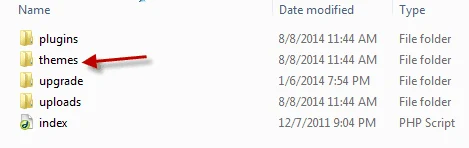
8 Open the “themes” folder.
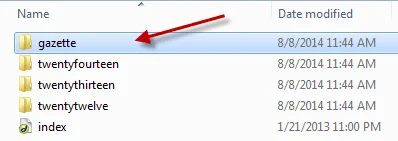
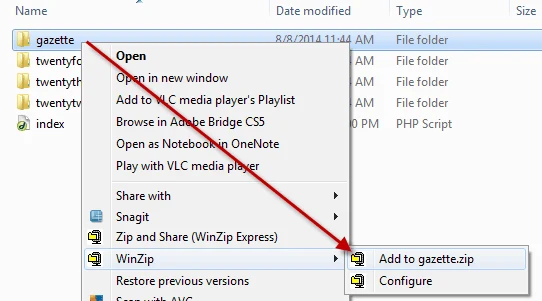
9 You should now see the premium theme. In this tutorial, it’s called “gazette“. Disregard twentyfourteen, twentythirteen, twentytwelve. These are the default WordPress themes.
10 Now, for easy upload, zip that gazette theme using Winzip or Winrar.
11 After zipping, upload the theme. There are two ways to upload the theme: 1) Through the WordPress Themes page (Add New Them feature) 2) Through cPanel (for cPanel based web hosts). For quick upload let’s use option 1. Let’s add the gazette theme using the WordPress Add New Theme feature.
12 Login to your WordPress website.
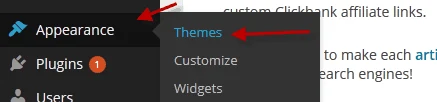
13 On your WordPress Dashboard, hover your mouse over the Appearance menu then click on the “Themes” submenu.
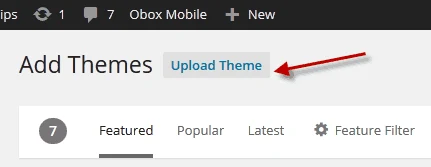
14 On the themes page, click the “Add New “.

15 Click “Upload Theme“.
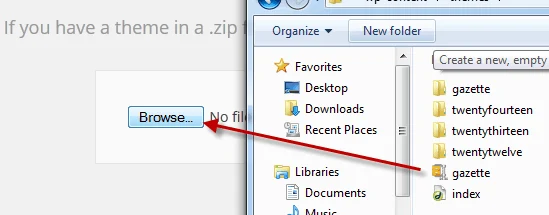
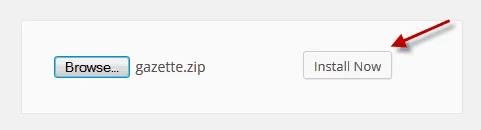
16 Click “Browse” to upload the theme from your hard drive.
17 Click “Install Now“.
18 Click “Activate” to make the new theme live on your site.
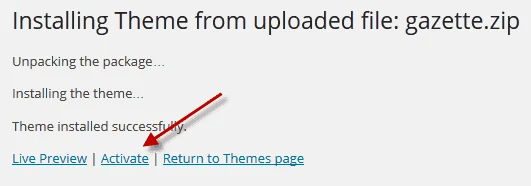
19 That’s it! Enjoy your new theme.
Feel free to request more tutorials regarding your WordPress blog/website. You can always contact us here.