Here’s a step-by-step guide on how to change existing affiliate links after installing a PLR blog. It’s so easy it won’t take you thousands of hours. Promise.
1. Log in to your WordPress account using this url format: http://yourdomain.com/wp-admin
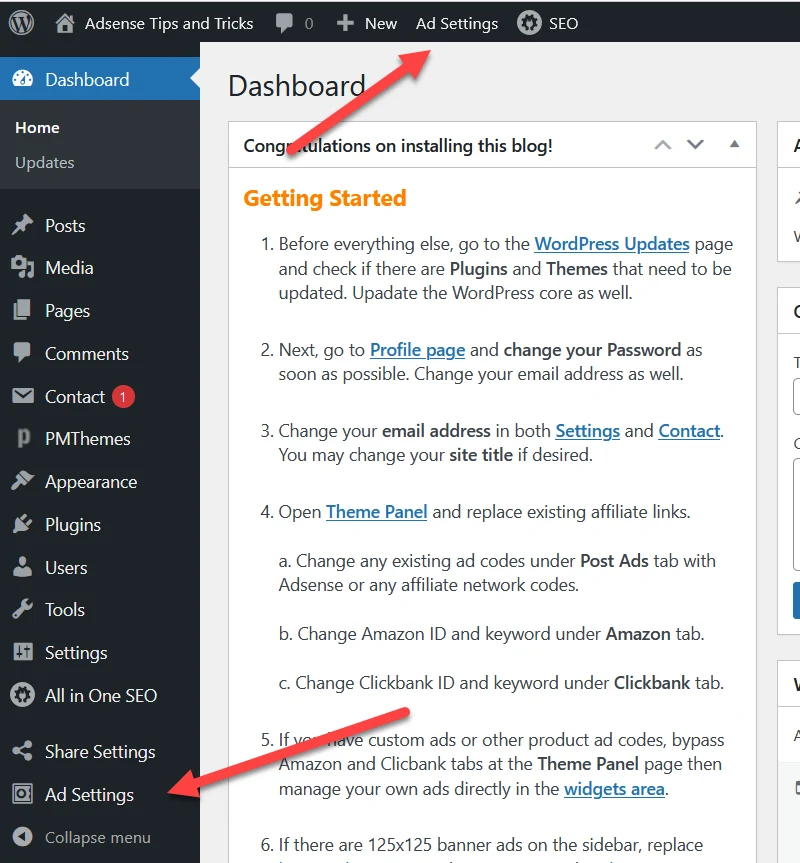
2. Once inside your WordPress Dashboard, clink on either of the two Ad Settings links.
3. You will be redirected to the theme’s ADS settings page.
You will see these four sections:
ADS Settings and Replacement Panel
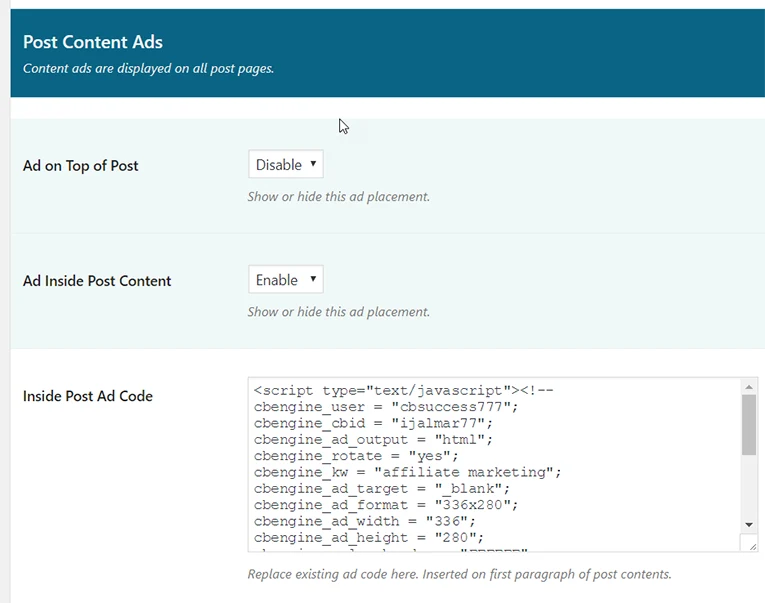
Post Content Ads
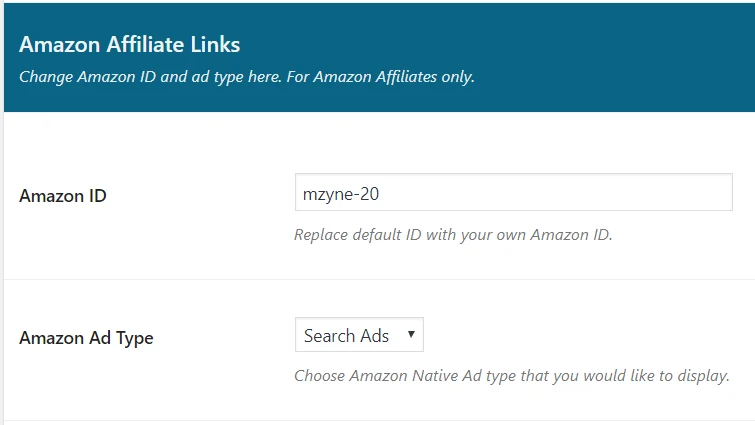
Amazon Affiliate Links
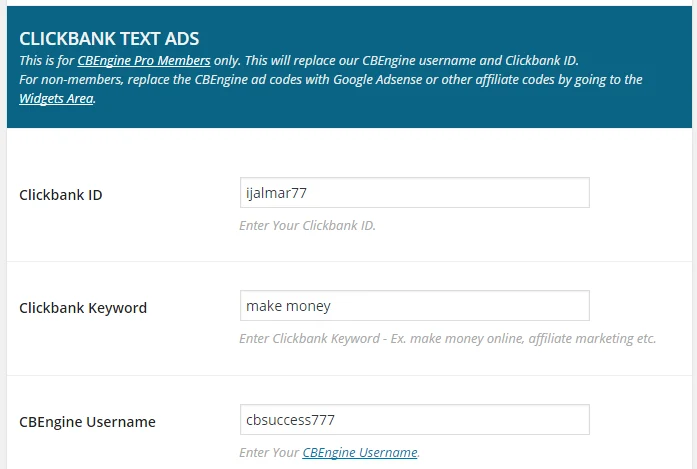
CLICKBANK TEXT ADS
REPLACE AFFILIATE LINKS
4. Change any ad codes in section “Post Content Ads” with your own ad code. Change it with your adsense code if you like to use Google Adsense.
5. If you’re an Amazon affiliate change ID and keyword under the “AMAZON ID” section.
6. If you’re a CBEngine member, change member ID and keyword under the “CLICKBANK TEXT ADS” section.
Please take note that this is for the text ads only (if there are any). It’s NOT a requirement to join CBEngine.
7. If you’re a Clickbank affiliate, go to “REPLACE AFFILIATE LINKS” section.
Generate your own encoded Clicbank affiliate links and replace Affiliate Link #1 and Affiliate Link #2 fields as needed.
Don’t forget to click Save Changes button!
That’s all you need to do here.
Common Questions
How do I generate encoded Clicbank affiliate links?