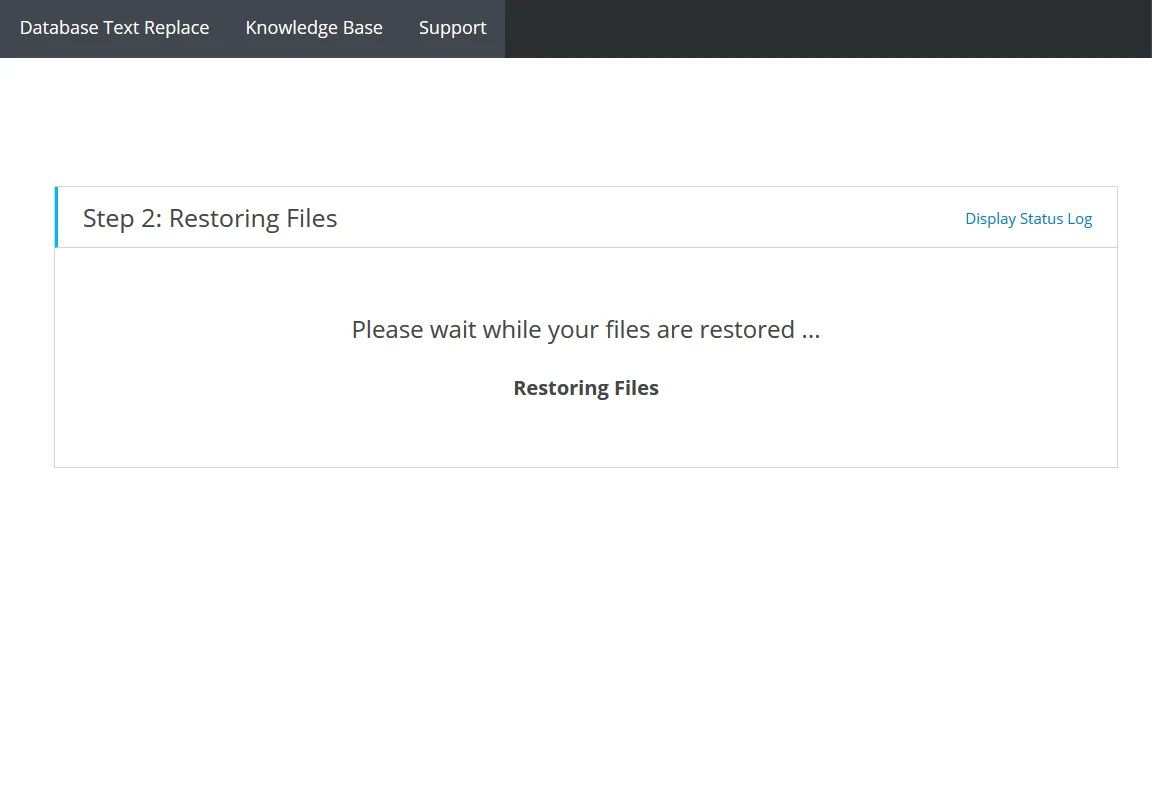
Sometimes when you are installing a blog package you may encounter a “hang” on “Step 2: Restoring Files“. The page just stops working with plain white background leaving you no other options and there’s no way to proceed. (Click image to view larger version)
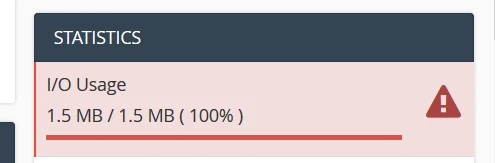
This behavior is due to a “throttling effect“; because your activity may have exceeded a certain webhost limit. Mostly, this is caused by a very low I/O usage set by your webhost administrator. See the image below.
Solution
In this case, the best solution is to do a manual file extraction and then skip file extraction when running the installation script. Here’s how to do it:
1 Make sure the installation files were actually extracted during your first installation attempt. (Click image to view larger version)
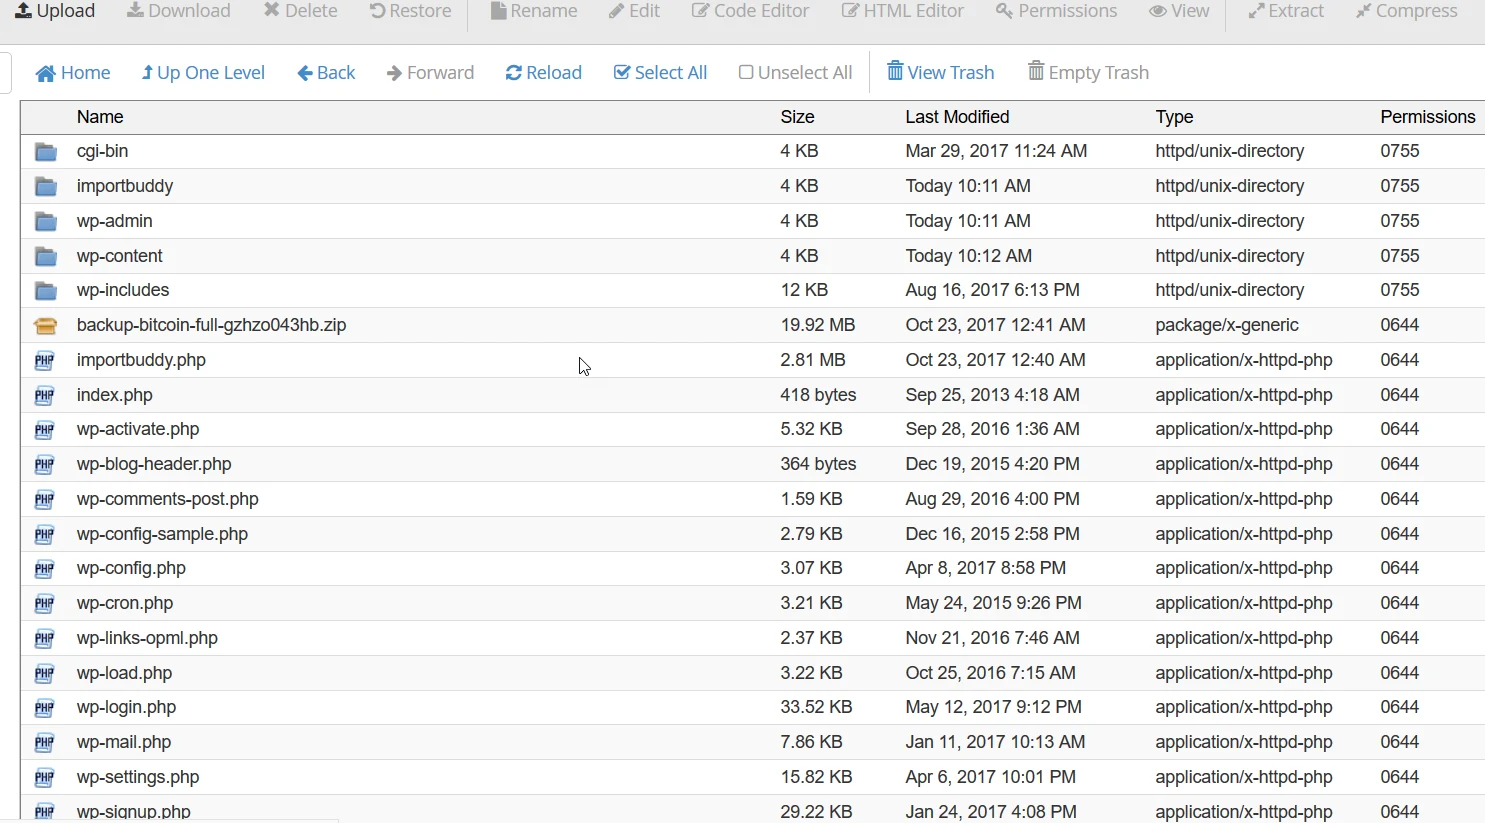
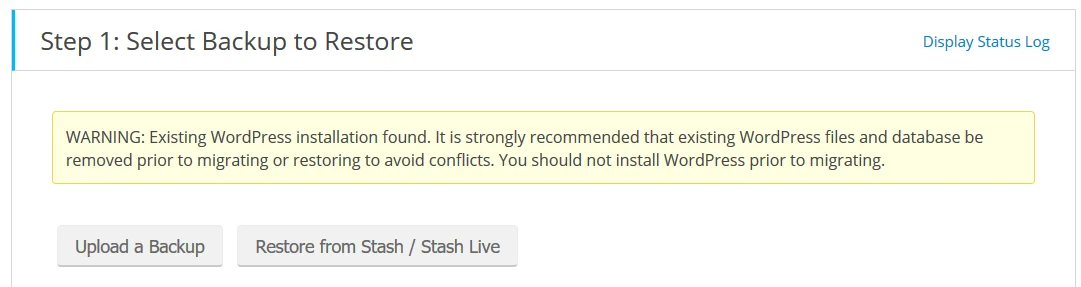
You will also know the install files are already extracted because you will see an “Existing WordPress installation found” warning when you restart the script. You may click the image to enlarge it.
Rarely will the file be un-extracted during the first installation attempt. But if for some reason, the install files remain intact, you need to extract the files manually.
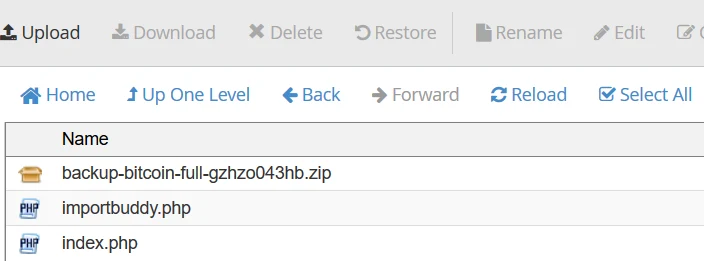
Also, if you have several blog packages to install and you know this problem is going to occur again (because of your web host’s limit) then you may want to go on and manually extract the install files before running the script.
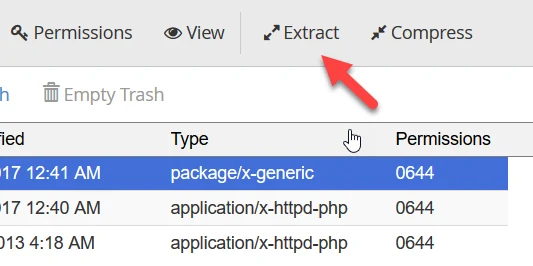
To extract the files on your own, just select and highlight the installer file then click the “Extract” button on your web host’s file manager dashboard.
2 Now, restart the importbuddy script.
Or simply refresh or reload the page.

Most of the time, there’s no need to re-enter your password here.
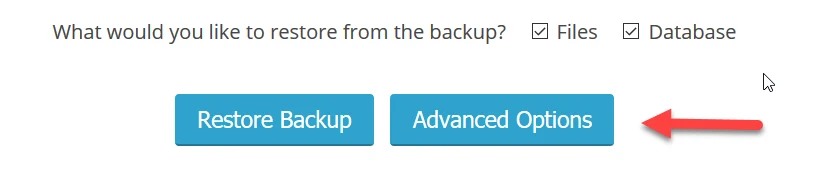
3 On “Step 1: Select Backup to Restore“, click “Advanced Options”
4 On the pop-up window, click “Skip unzipping or opening archive (for manual extraction).”
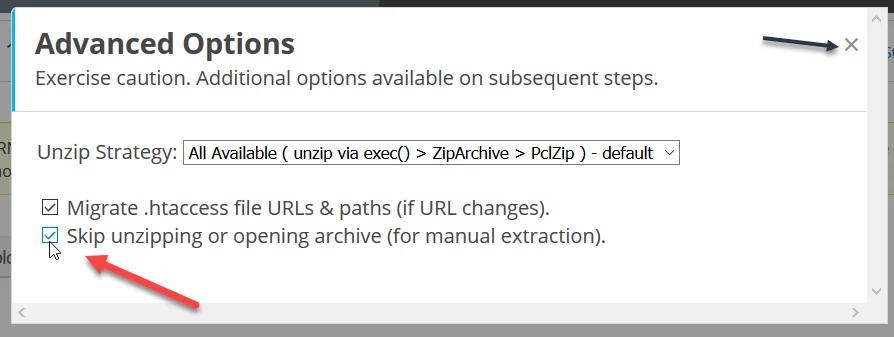
Click the little x button or just click anywhere on your screen to exit from the popup window.
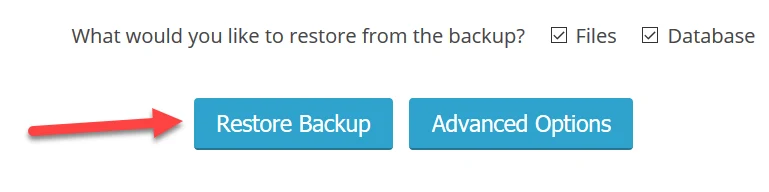
5 Click the “Restore Backup” button.
6 That’s it, you should be able to continue your installation process on “Step 3: Database Settings“. (Click image to view larger version)