You should install this plugin only if your WordPress (WP) has a very low file upload limit and you want to increase it to at least 512MB. While many webhost providers automatically set the maximum upload file size to 512MB some may not care and just limit it to only 2MB.
This step is necessary when installing PLR blogs on web hosts that have a very low file upload limit. Most PLR blogs have file sizes ranging from 40 to 60MB.
So, if your webhost allows you at least 64MB then you’re good to go. You can go ahead with the installation.
On the other hand, if your webhost has less than 64MB file upload limit you need to increase it using cPanel.
If you don’t have cPanel, it could be a hassle. You need to request your webhost provider to increase your file upload limit. The problem with this approach is that it could take time because you may need several chat exchanges with your web host’s support before they can actually understand your concern.
So the simplest and quickest way is to install the “All-in-One WP Migration File Extension” plugin. Watch quick video below:
Here’s a fully-illustrated guide on how to do it:
- Click here to download the extension plugin. Take note of the folder where you’re downloading the file.
- Log in to your WP Dashboard. New to WordPress? Here’s how to log in.
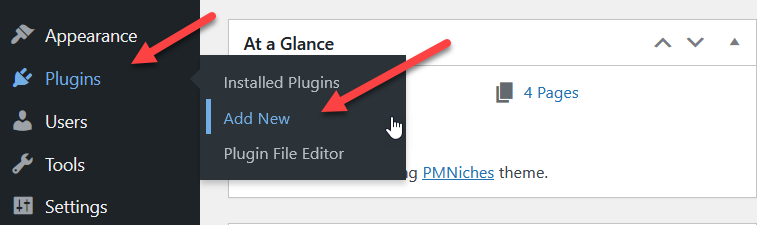
- Hover your mouse over the “Plugins” menu then click the “Add New” link.
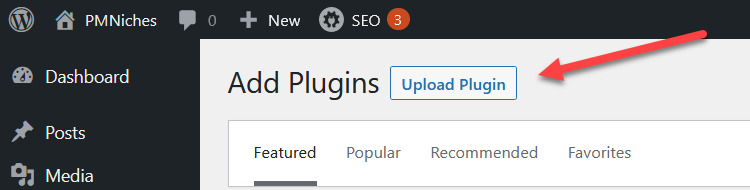
- Click the “Upload Plugin” button.
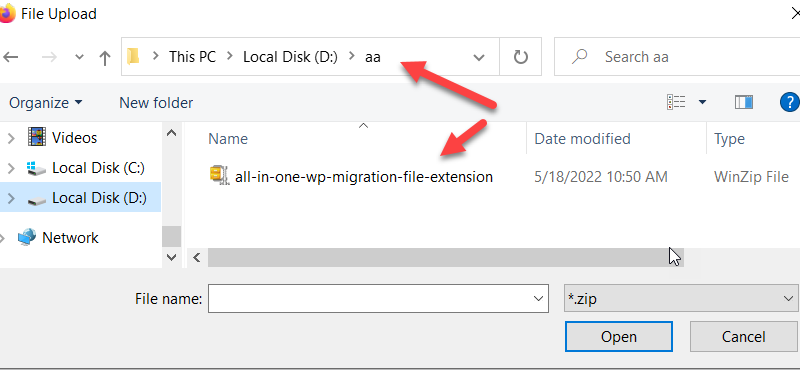
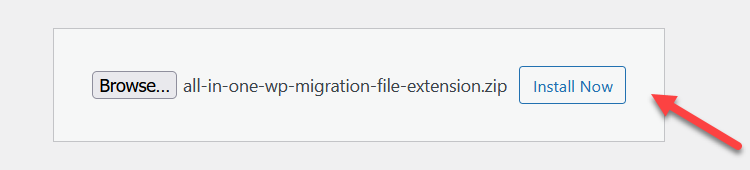
- Click the “Browse” button.

- Locate the folder where you download the extension in step 1.
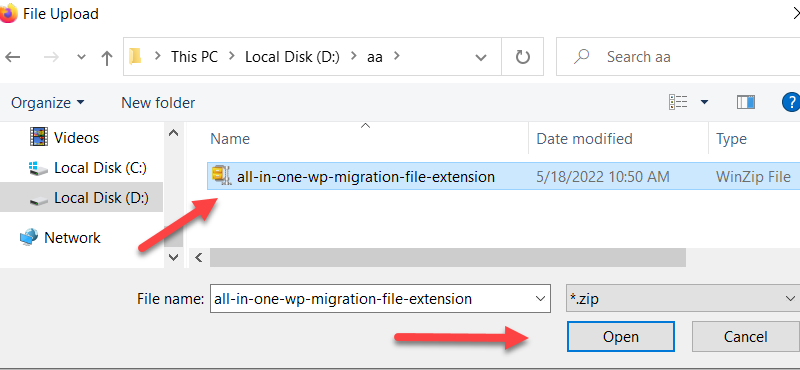
- Choose/highlight the file then click the “Open” button.
- Click the “Install Now” button.
- Click the “Activate Plugin” button.

That’s it. Plugin activated!