There are instances where you need to increase the PHP memory limit of your WordPress site. However, you should only do this if you are experiencing problems like the following:
- You are experiencing a blank screen when navigating to some parts of your website, especially the admin page. This is also referred to as the “WordPress white screen of death“.
- You get stuck during the process of blog installation when using the All in One WP Migration plugin. The importing process hangs up and never comes to completion.
- You are getting a screen message like “
Fatal error: Allowed memory size of 33554432…” and a similar fatal error message when viewing parts of your website.
When addressing the issues mentioned above, the first thing to do is to edit the wp-config.php file on your WordPress site. It is located in your WordPress site’s root folder, and you will need to use an FTP client or file manager in your web hosting control panel.
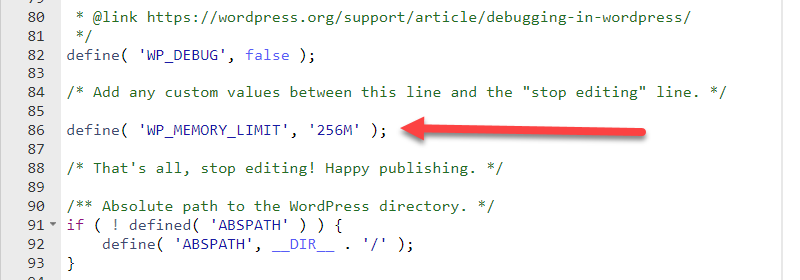
Just paste this code in the wp-config.php file just before the line that says “That’s all, stop editing! Happy blogging.”
define( 'WP_MEMORY_LIMIT', '256M' );This code tells WordPress to increase the PHP memory limit to 256MB.
Step by Step Guide for Beginner Webmasters
For complete beginners, here’s a step-by-step guide on how to edit the wp-config.php file:
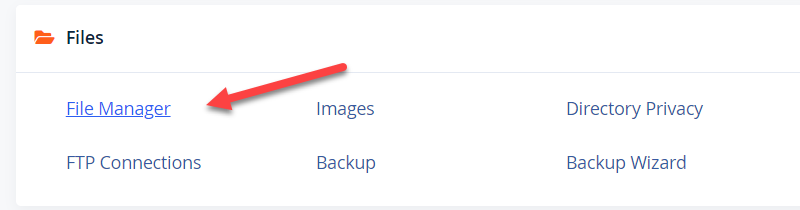
- Login to Your cPanel. How? Check this.
- Find and click the “File Manage” Icon/Link.
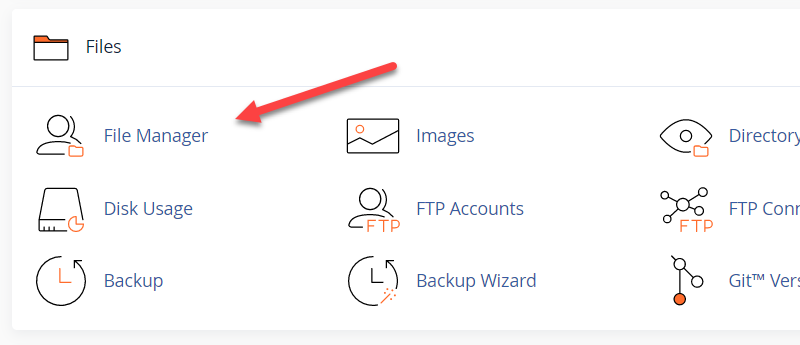
If you are still using the paper lantern theme, here’s what it looks like.
- The File Manager page will open in a new tab.
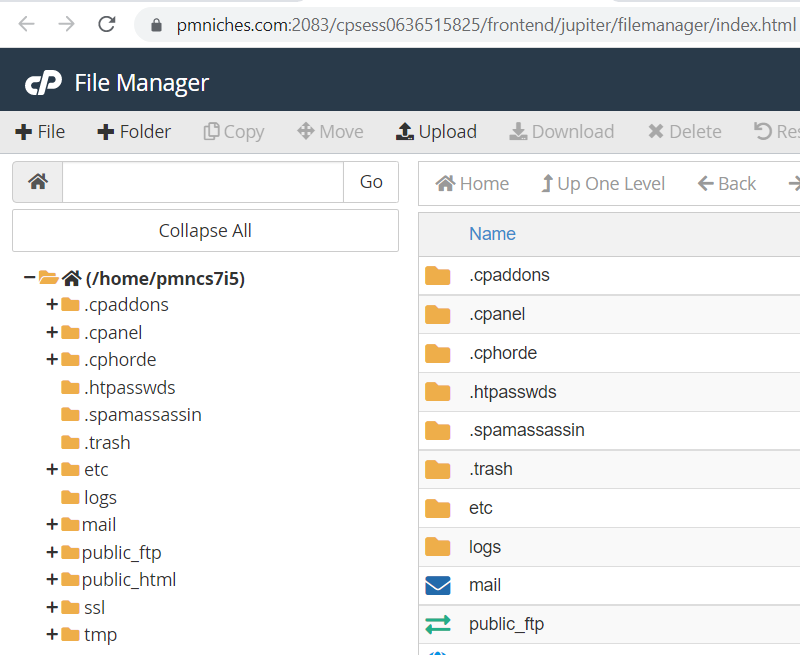
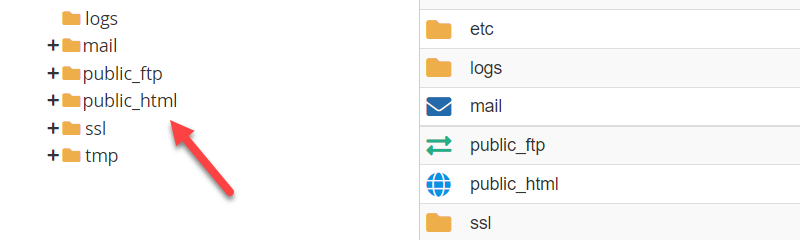
- Click the “public_html” folder.
- Click the wp-config.php file.
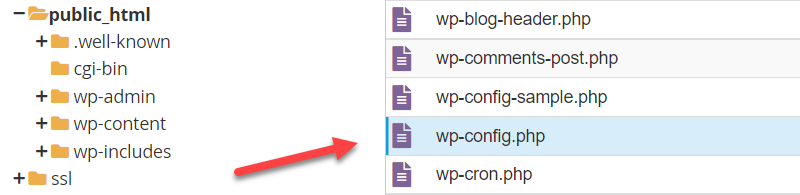
Don’t double click. Just one click only. The file should be highlighted as shown above screenshot.
- Now, right click over the wp-config.php file to bring out a menu box.
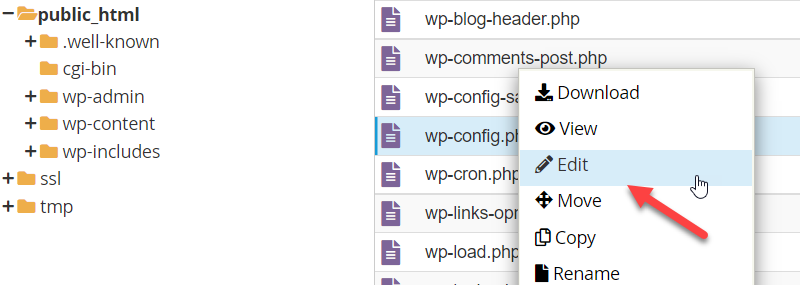
- Click the “Edit” icon/link. See screenshot above.
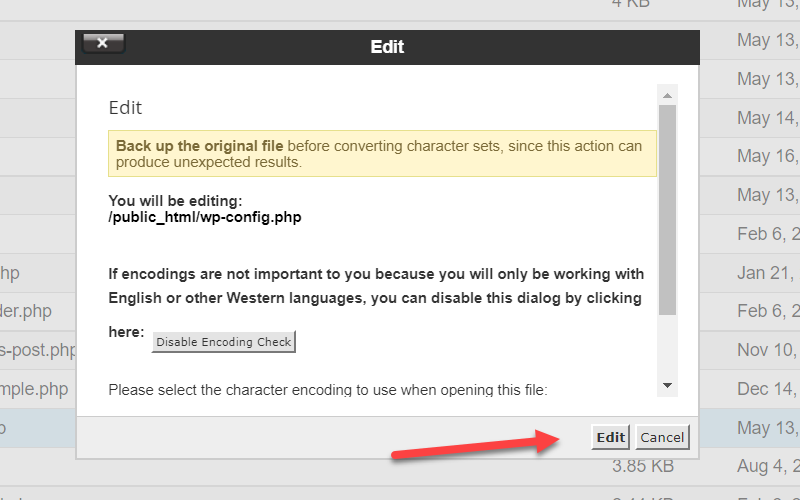
- Click the “Edit” button.
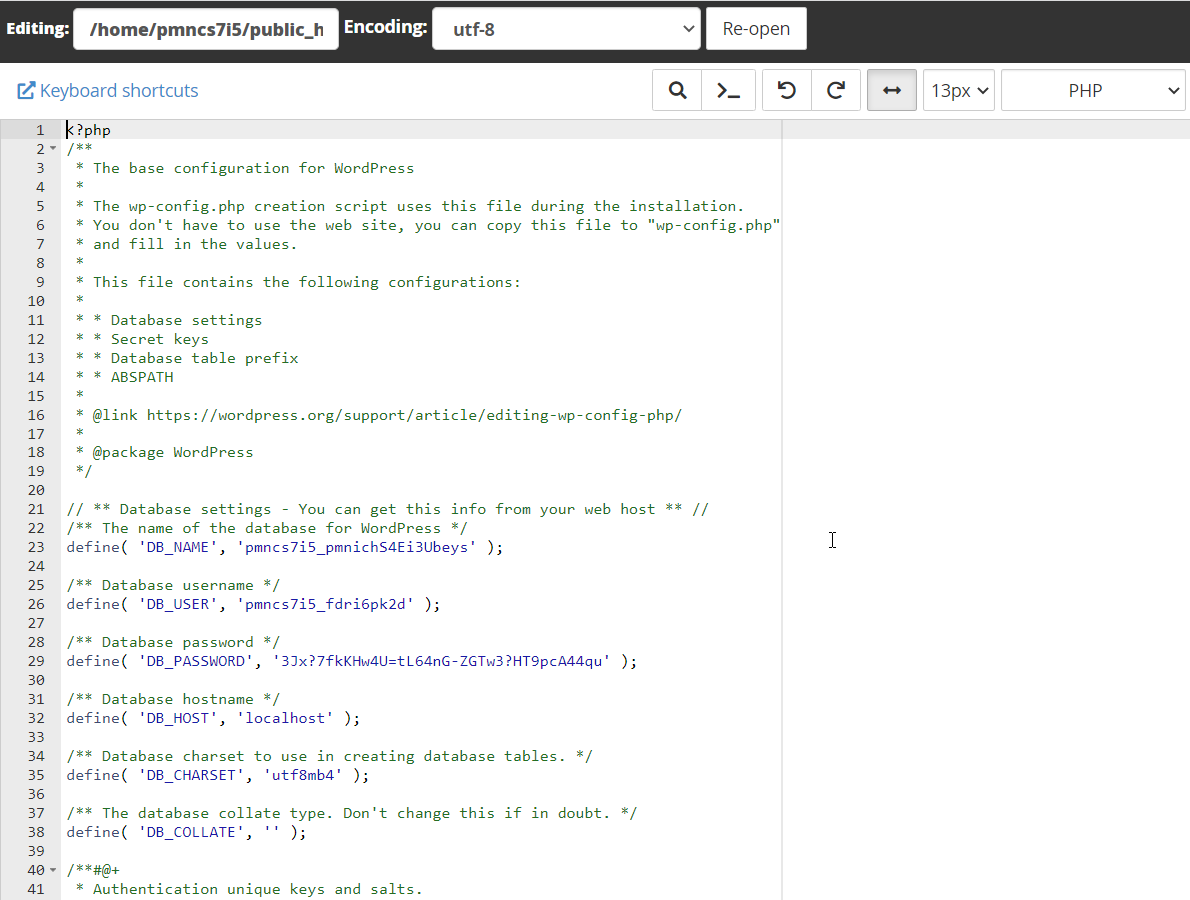
- A code editor page will open in a new tab. Here’s how it looks like:
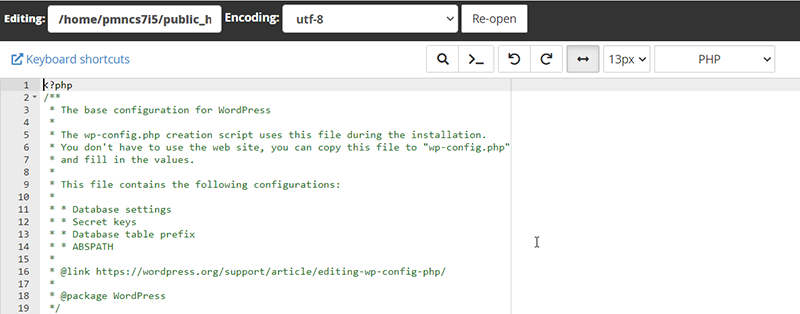
Want to see a larger version? Click here.
- Now, scroll down until the line that says, /* That’s all, stop editing! Happy publishing. */
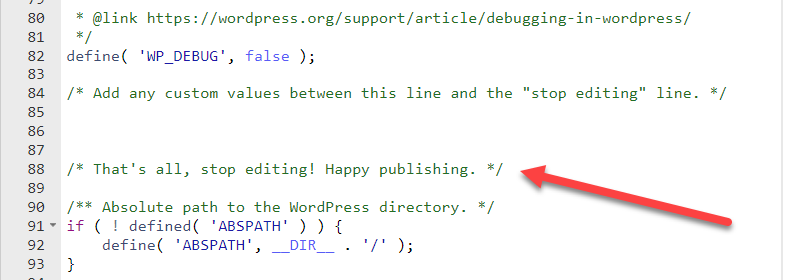
- Copy and paste the below code before that line.
define( 'WP_MEMORY_LIMIT', '256M' );
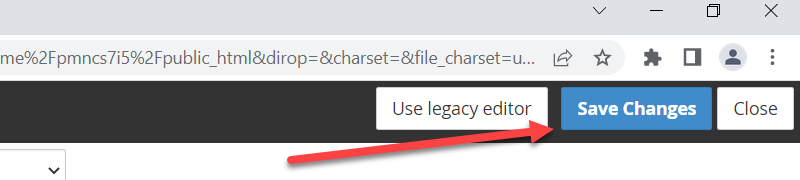
- Finally, click the “Save Changes” button found at the topmost right of your screen.
That’s all, folks. Your WordPress memory limit is increased to 256M.
Try using a lower number, say 128M, or a higher one at 512M. Don’t forget to always include the letter “M“. Forgetting the letter M is a common mistake, so recheck your code.


