Using All-in-One WP Migration Plugin is the easier and quicker way of installing your ready-made blogs without having to upload the backup files to your server/webhost. This method requires a pre-installed WordPress (WP) site. You can install a fresh WP site using Softaculous.
Before anything else, please check the allowed “Maximum upload file size” of your WordPress Install. If it allows at least 64MB then you’re good to go. You can go ahead with the installation.
On the other hand, if the upload limit is less than 64MB you can quickly increase it by following this guide: Increase your maximum upload size via cPanel.
If your webhost don’t use cPanel, you need to install the “All-in-One WP Migration File Extension” plugin. Follow this guide: How to Install the All-in-One WP Migration File Extension.
Now, if you’re sure that your WordPress install could accommodate the upload limit, then go ahead with the installation instruction below.
Here’s a quick video:
Here’s a step-by-step and fully illustrated guide on how to install your blog using the All in One WP Migration plugin:
- First, unzip the blog file on your laptop/computer.
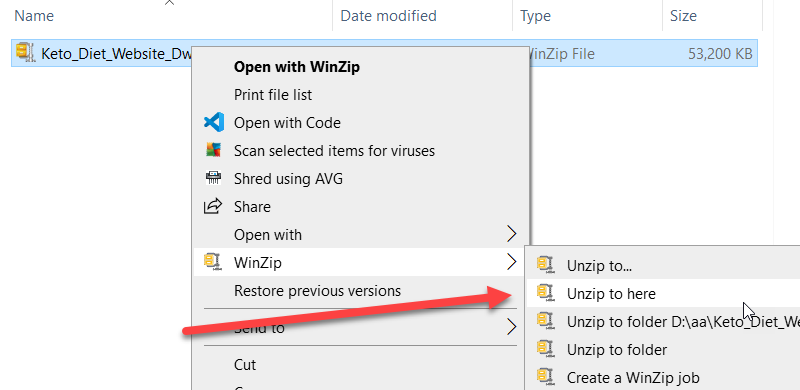
I always include this step on any blog installation tutorial because many folks assume that they’ll just upload the whole thing without unzipping it first. - Log in to your WP Dashboard. New to WordPress? Here’s how to log in.
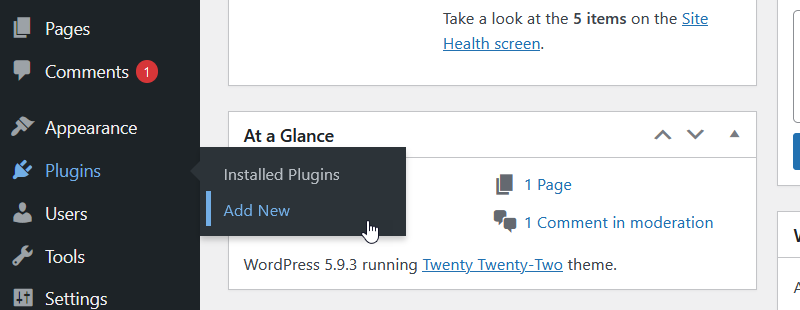
- Hover your mouse over the “Plugins” menu then click the “Add New” link.
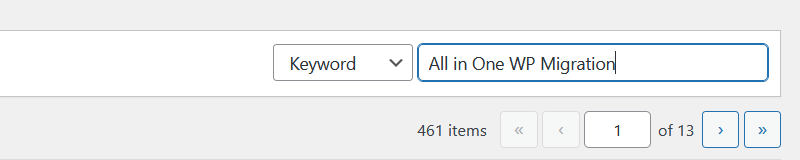
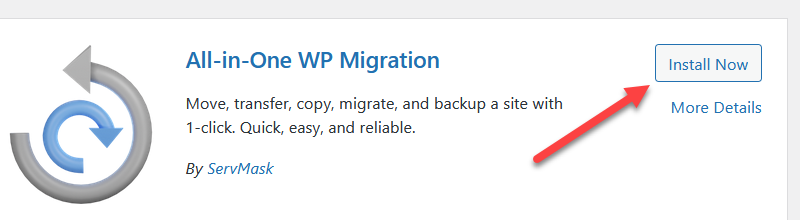
- On the “Add Plugins” page, type “All in One WP Migration” on the Search plugins field. You should be able to see the plugin name in the search results.
- Be sure that the plugin author is by ServMask.
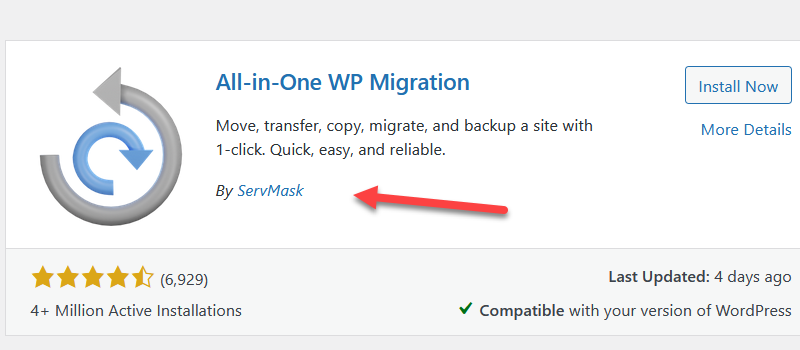
- Now, click the “Install Now” button.
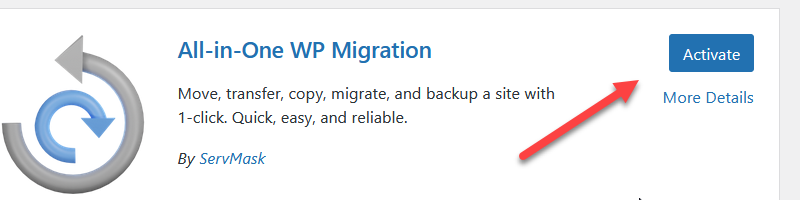
- Click “Activate.”
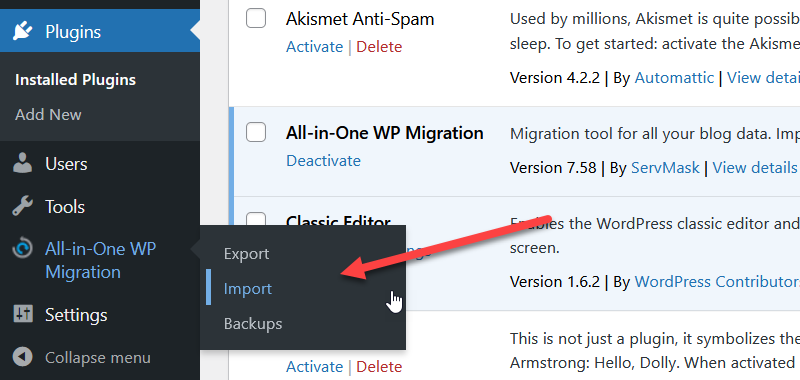
- Hover your mouse over the new “All-in-One WP Migration” menu then click on “Import“.
- On the import site page, click the “Import From” menu.
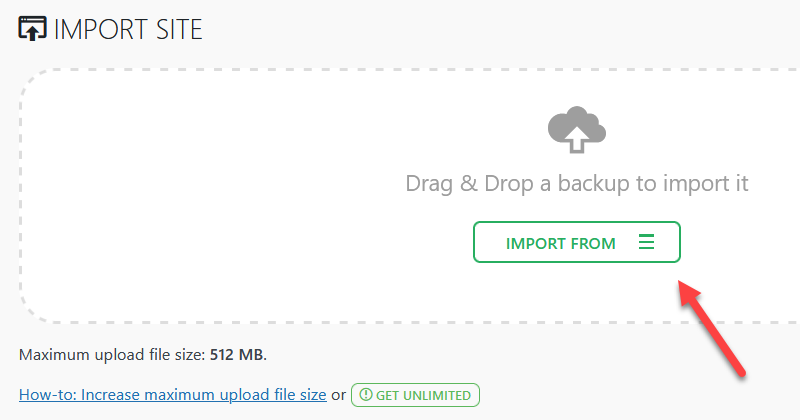
- Click on “FILE” from the dropdown menu.

- A “File Upload” window will pop up.
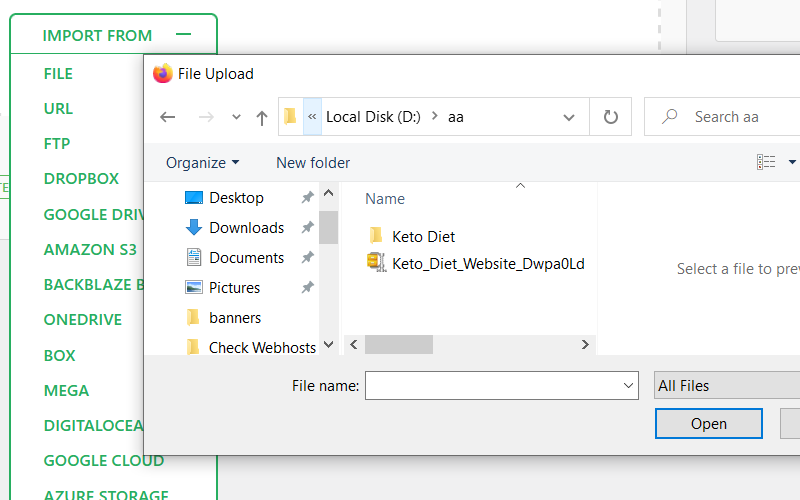
You should be able to locate that file you’ve downloaded from the PLR blog site.
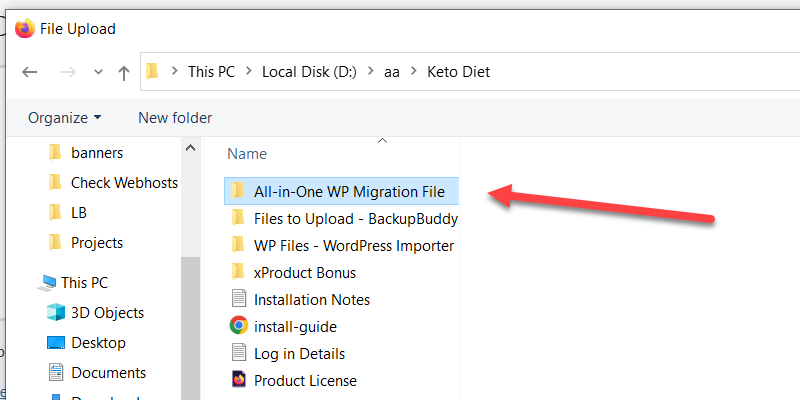
Note: I made the pop-up window smaller to fit this tutorial page. - Find the sub-folder called “All-in-One WP Migration File“. Open that folder.
- Select the .wpress file then click the “Open” button.
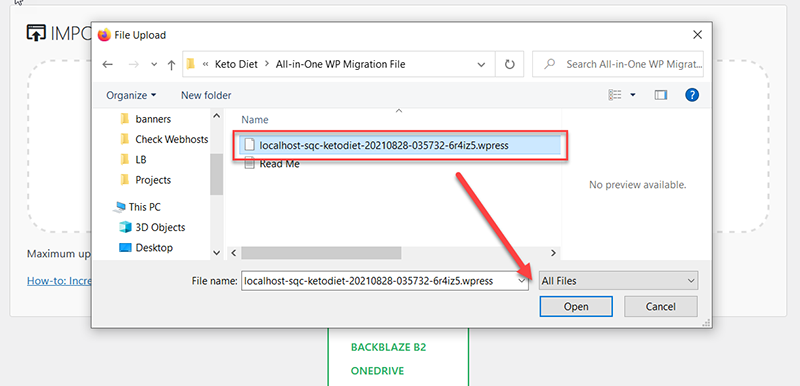
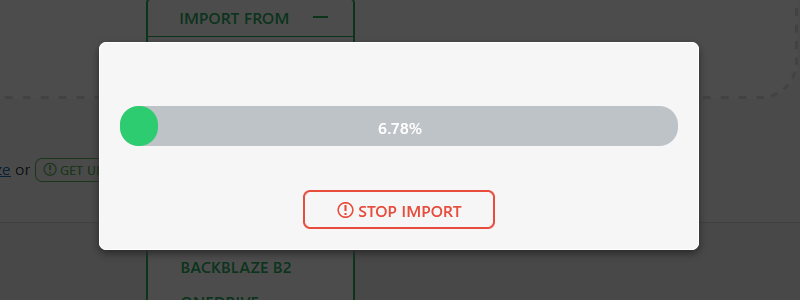
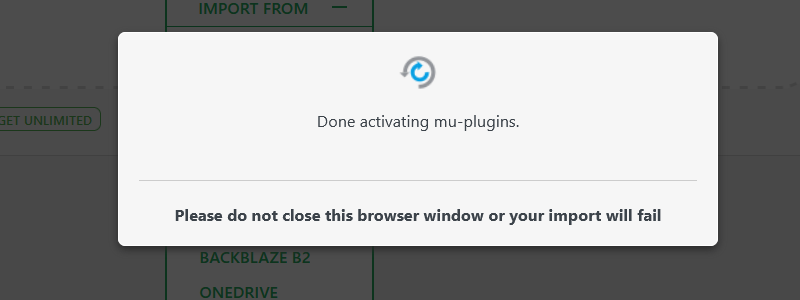
I deliberately resize the window to fit this tut page. You can see a bigger screenshot here. - The script should start the importing process.
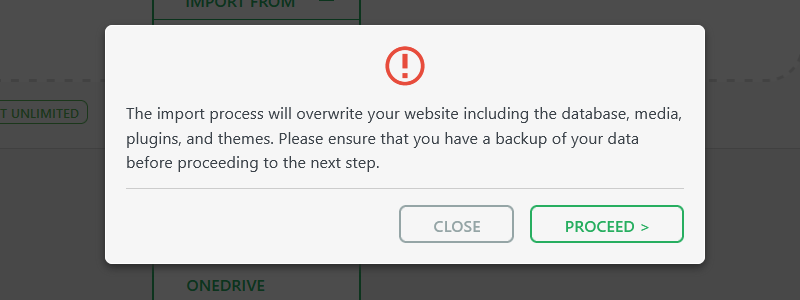
- Just click the “Proceed” button.
- Click “Finish” and you’re done.
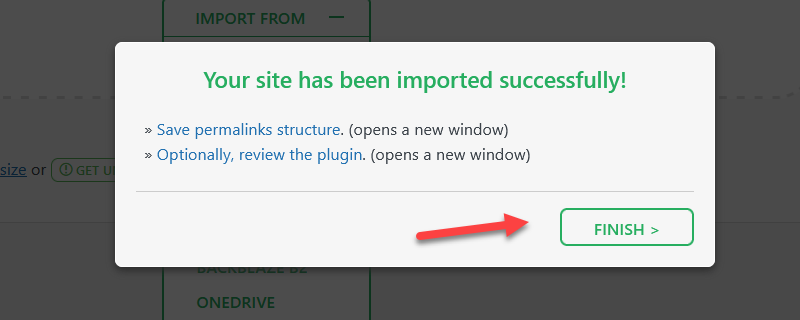
That’s it.
Check your new site. You need to relog into your newly installed site. Use the login info included with your download file.
Important Reminder
This method will replace an existing WordPress site. In addition, the import process will overwrite your website, including the database, media, plugins, and themes.
So it’s not advisable to do this on an existing site with content that you don’t want to lose.
This method is excellent for:
- Any webhost and domain as long as WordPress is already installed.
- Web hosts that offer a one-click install for WordPress.
- Replacing an existing WP site or even an old one.
Problems/Issues During and After Installation
Here are some of the common issues and possible solutions during and after blog installation.
Problem #1: Getting stuck during the importing process
Just after clicking the “Proceed” button, your screen seems to hang up. The icon keeps spinning forever without any progress.
Problem #2: Error when trying to login using /wp-admin
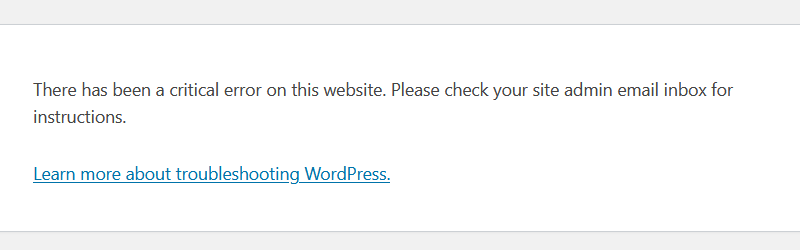
This is a common issue that you may encounter after the installation process.
Other symptoms: the slider on the homepage is not working, footer missing, sidebar missing
Problem #3: WordPress white screen of death
You see a blank screen when navigating to some parts of your website, especially the admin page.
Possible Solutions
Problems #1, #2, and #3 mentioned above are common issues you’ll likely encounter when installing blogs using the All in One Migration plugin. They all have a common root cause that can be addressed by doing the solutions below.
Solution 1: Increase Your WordPress Memory Limit
Some web hosts have very low PHP memory limits which may not be favorable for your WordPress install. To remedy this problem try increasing the memory.
If your webhost uses cPanel, this task is a lot easier. Just follow this guide: Increase PHP Memory Limit & Max Upload File Size via cPanel
On the other hand, if you don’t use cPanel follow this step-by-step guide: How to Increase WordPress PHP Memory Limit via WP Config
Solution 2: Check System PHP Version
Check your system’s PHP version. It should be at version “7.4“. If your webhost set it at 7.3 or lower, you should be able to upgrade it to 7.4.
On the other hand, if your webhost has set it to 8.0 you may need to downgrade it to 7.4 and then test it by opening your website. Some themes and plugins may not be compatible yet with the newest 8.0 version.
So how do I upgrade or downgrade the PHP version? Check this guide: How to Upgrade Your PHP Version Via cPanel
Contact Us
Should you encounter issues during or after the installation process and you’re not sure what to do, feel free to contact us and we’ll gladly assist you.


