Changing your WordPress administration email address should be quick and straightforward. Just change the old email with your email then WordPress will send a confirmation link to your new address.
You then log in to your new email, click the confirmation link, and that’s it.
Your new admin email should be active now.
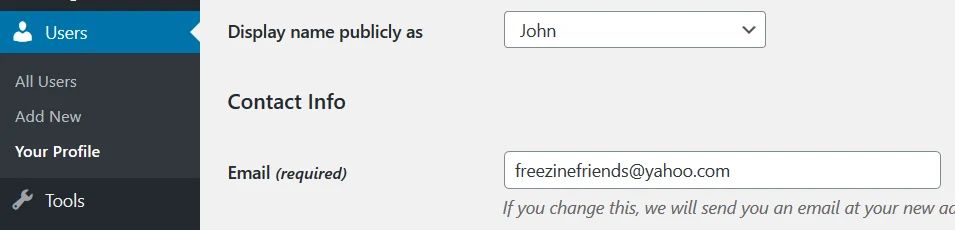
The process is the same when you want to change your user email, which is found under “Users => Your Profile.”
The Problem
The problem, however, comes when for some reason, WordPress or your webhost is unable to send the confirmation link to your new email.
Sometimes, your email provider is automatically blocking emails from your own domain.
That’s when you begin to wonder why no confirmation link is coming… and then you almost want to blame your PLR blog provider. 🙂
The good news is there’s a quick though not so comfortable way of changing your admin and user email address.
Just edit the “wp_options” table by logging in to your cPanel, then simply edit your site/blogs’ database file via phpMyAdmin.
This method may look scary for many folks but let me guide you through a step-by-step tutorial.
Warning: This method could be uncomfortable for some, specially technically-challenged folks. It can cause untoward issues to your site.
If, for some reason, you badly needed to change your admin email through this method, make sure to make a backup of your blog/site first before proceeding.
Make sure also that your webhost provider allows you access to phpMyAdmin. Otherwise, this tutorial may not of helped.
Step-by-Step Guide
Step 1: Log in to your cPanel. For first-time web admins, here’s how to log in.
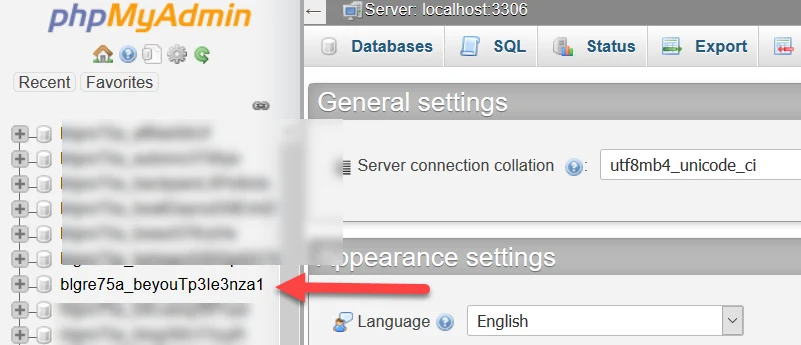
Step 2: Take note of your site/blog’s database name.
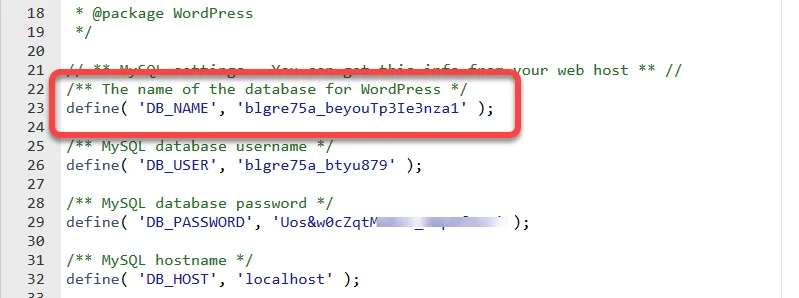
Your database name is found inside the wp-config.php file. Access this file by going to File Manager => root folder of your domain.
Step 3: Find the phpMyAdmin icon/link, usually included under the DATABASES group, then click on it.
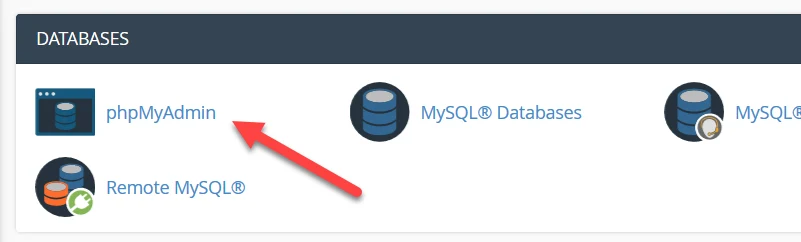
You will be redirected to the “phpMyAdmin” page.
Step 4: If you have several databases on the list, find your database name, then click on it.
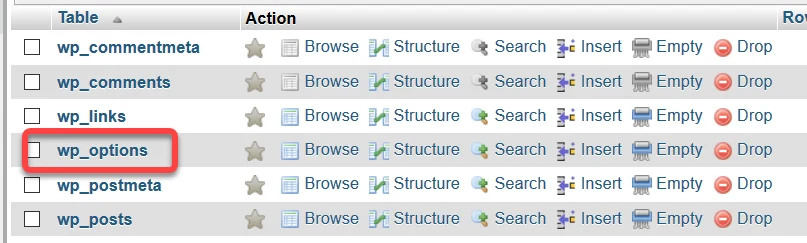
Step 5: Click “wp_options” sub-table.
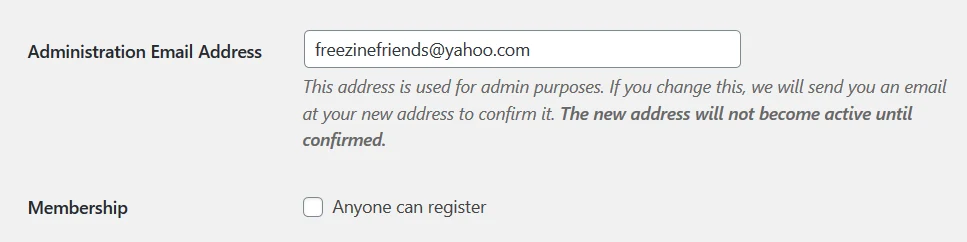
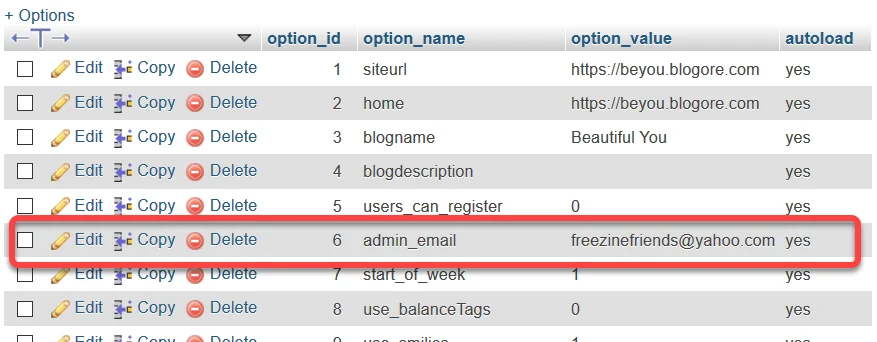
Step 6: Click the “Edit” link within the row where you can see “option_name = admin_email” and “option_value = the old mail” you want to replace (in this case is freezinefriends at yahoo, see screenshot below).
Step 7: Now, delete the old mail and enter your new email.
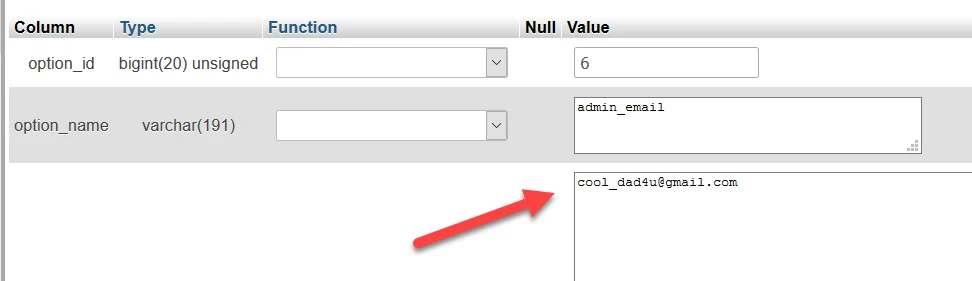
Step 8: Click the “Go” button below that table.

Step 9: Verify your changes.

Step 10: Go back to your WordPress dashboard (under General Settings) and see if the email change is successful. You need to refresh your browser.
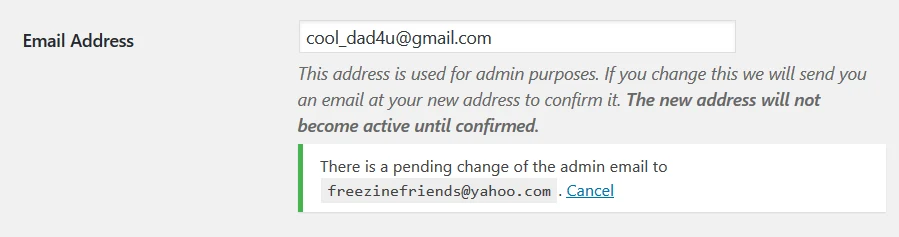
Step 11: As you can see, there’s a pending change notice below your new email address. I can’t understand why there’s a need to do that because it’s impossible to confirm that old email (freezinefriends) since you don’t have control over it.
Just click the “Cancel” button.
Step 12: If you noticed, the label has been changed from “Administration Email Address” to “Email Address” only.

Don’t be bothered by that. It will revert back to “Administration Email Address” when you update WordPress to its next version.
Changing Your User Email
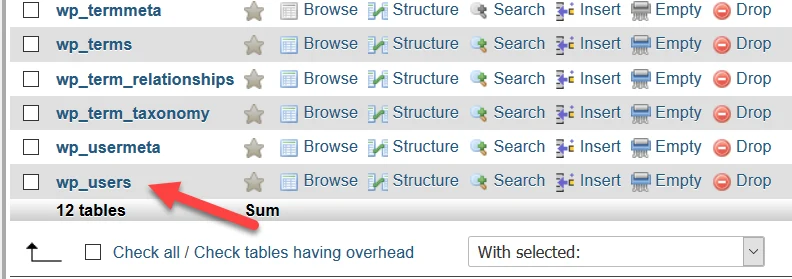
Step 1: Go back to your site/blog’s database table, then click on “wp_users“.
Step 2: Click the “Edit” button.

Step 3: Delete the old mail and enter your new email.

Step 4. Click the “Go” button found at the bottom of the table.

Step 5: Check your Profile user email address.

That’s it!
But don’t close your wp_user table yet. See below why.
Changing Your Username and Password
If you want to change the current username and password, follow the simple steps below.
This method is also important when you forget your admin password and can’t access the reset password feature because the admin email is not yours or you installed a PLR blog from PreMadeNiches, and you want to change the old username.
Step 1: Go back and click back “Edit” button.

Step 2: To change your username, edit the value on the user_login row. For this example, change “modern” to whatever username you want to use.

Step 3: To change the password, click the inverted triangle within the user_pass row, then highlight-click “MD5“
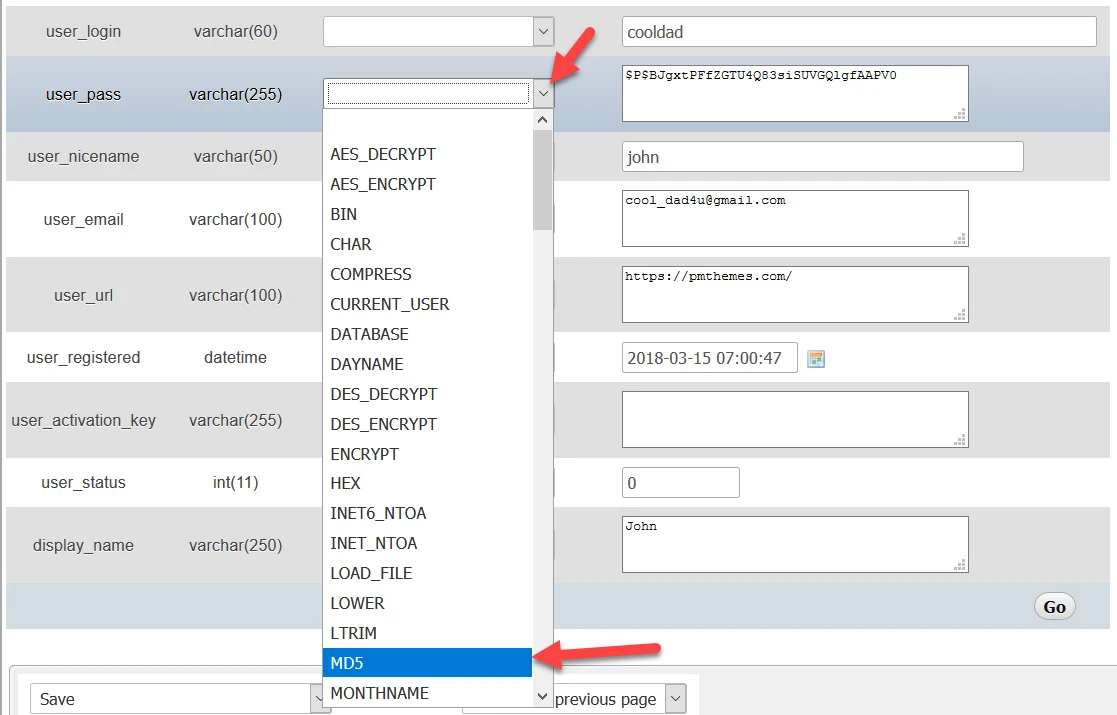
Step 4: Now, type your new password. See the screenshot below.

Be sure MD5 is selected. See the screenshot above.
Step 5. Click the “Go” button, which is found at the bottom of the table.
That’s it! Test your new username and password.
Summary
As a webmaster, editing your site/blog’s database allows you to quickly change important credentials such as username, password, admin email, and user email.
Changing even one of them can become a hassle, especially if unnecessary roadblocks are in place.
Master this basic webmaster skill, and you’re on your way to having more control of your own website.